Painting Illusion

Wednesday, December 26, 2012

Artist Easels


There are 10 types of easels that artists use, each with a slightly different purpose.

Here are the main types of easels for artists:
  • A-frame easels (also called Lyre easels)
  • H-frame easels
  • Giant easels
  • Convertible easels (also called Hybrid easels)
  • Single mast easels
  • Tabletop art easels
  • Portable easels (also called Plein air easels)
  • Bench easels (also called Art horses)
  • Display easels
  • Childrens easels

Wednesday, December 19, 2012

Acrylic Flower Painting


My paintings are my practice to develope my eyes. But this time, its something special for me. I did this painting to my husband as a gift for his b'day. I think its something good, making gifts by ourselves for our loved ones. 
I have used various colors - Titanium White, Raw Umber, Primary Red, Crimson Red, Red Oxide, Cadmium Red, Hookers Green, Raw Sienna and Gold here to do this painting. I also tried Coarse Pumic Gel[mixed with the color Raw Umber] to get a solid rectangular part, and then when it dried[it took one full night to get dried] I gave some thin strokes with Gold color on it.  
Finally I varnished the canvas to get a complete look. And ofcourse, varnishing helps you to protect your paintings.

Monday, October 1, 2012

Top Three Essential Acrylic Mediums for the Beginning Artist


The Essential Acrylic Mediums for the Beginning Artist are the ones that will be used with each painting. Once these acrylic mediums are used, the acrylic artist will come to rely on their consistent effects.

Acrylic Gesso - Acrylic Gesso is typically a white, opaque liquid mixture used as a absorbent primer or coat for your canvas.  It works to coat, or prime, the painting support. Acrylic Gesso is heavy -bodied and can also serve as an underpainting. Today, lots of ready-made, stretched canvas comes already coated with acrylic  gesso. And some pre-framed canvases come "pre-primed". 
Although usually white, Gesso also comes in other colors too, such as black, blue, gray, gold, red ... even clear.

Retarder - Retarder is an absolute essential acrylic medium. The acrylic retarder actually slows down the drying time of the paint. To maintain the integrity of the acrylic paint, use no more than 15% of the retarder, in relation to the amount of paint. One or two drops is usually enough reatarder to keep the paint wet.

Acrylic Flow Release or Acylic Flow Enhancer - Either of these products will help the paint move more easily on the canvas. Certain acrylic colors will need the addition of acrylic flow release more than others. It is effective for achieving rich stains on a porous surface. It is also useful for wet-in-wet techniques and reducing skinning on the palette.

Thursday, September 6, 2012

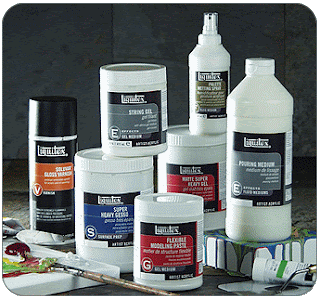
Guide to Acrylic Mediums and Additives


Acrylic painting involves the use of different types of acrylic mediums.With the help of mediums, acrylics may be used in a fluid, gestural manner (much like water color) or in heavier applications (as with oils) or they can be shaped and carved, used for print making or in virtually any other technique imaginable.

Acrylic mediums are used to control how the paint moves on the palette. Acrylic mediums can also be used to lengthen the drying time of acrylic paint. Still other acrylic mediums affect how matte or glossy the acrylic painting is once it completely dries. Other mediums can also be used to refract light and color, add texture to acrylic paintings, and to adhere collage items to paintings.

Because acrylic mediums can be cost more than the actually acrylic paintings themselves, it is important to start with only the acrylic mediums you need to produce a desired painting effect. Acrylic mediums need to be explored, played with, and used for painting experimentation. The acrylic medium may not behave the way you intended. An artist would rather find that out during the experimentation phase of exploring acrylic mediums than when working on a final painting.

Mediums can help you to:
  • Improve durability
  • Keep your colours brilliant
  • Extend the colour
  • Bring transperancy and depth 
  • Improve flow and "brush-ability"

Image courtesy: https://www.google.com/

How to Add Detail to the Foreground of your Picture


This post is about the techniques for adding detail to your painting. Trying to create a  sense of depth and distance in your landscape is the key for creating realism in your paintings. Adding extra detail to the foreground of a painting helps to make the background look further away and can give depth to a picture. With acrylics, you can easily paint over any details you want. The closer area is the front of a picture the more detail you can see. So adding some extra details to this area is a good idea.

Painting Surface:
It is very important to consider your painting surface. The amount of detail you can achieve will depend on the painting surface you are using. You will be able to add more detail on a smooth surface than you can on a rough surface.

Techniques that can be used:
  • One painting technique to achieve this is to scrape out grassy things in a landscape. Or perhaps scratch out a texture in other subjects. When using acrylic paints I prefer to scrape out the shapes while the paint is still wet.
  • The palette knife can be used to scrape out the shape of a subject while using thicker paints. The palette knife can be either flat or edge depending on the effect you want.
  • Another thing you can use is the end of a paint brush.This technique is good for thinner paints and smoother painting surfaces.
  • You can even use your finger nails to create this effect. 
  • Once the paint has dried you can also paint in further detail to the scraped out shapes for highlights and shadows to give the shapes extra definition.

Friday, August 31, 2012

How to do acrylic flower painting


Starting with flowers is definitely an interesting way to create your skill. This is a painting for a beginner to medium experienced painters. Each layer is fairly thin(a glaze) because the paint colour is mixed with a small bit of water to make it flow more evenly. If you would rather use flow medium, that is acceptable also. Each layer of glaze must dry before the next layer goes on. Have patience! It is worth the time to get this technique right. Stick to the painting tips during these steps and you will be in a position to paint flowers with acrylic paint.

  1. Select how many flowers you will paint and how they will be organized. It doesn't need to be exact- just indicate general dimensions and placement.
  2. Prepare the actual canvas. Arrange the paints and brushes exactly where they are handy for the reach. Set your canvas on an easel or even work desk to start your work.
  3. Block in the background using the shades of your need. Let it dry; it won't take long.
  4. Draw the rough outline of the picture with pencil or chalk onto the background of the canvas. Use light outlines. Using a chalk, you can draw and erase loads of times and as long as you don't over-wet the surface, it will not hurt the painting underneath.
  5. Using a fine brush, paint the petals with Titanium White. Then paint a layer of the colour you need onto these white areas.
  6. Each petal has a highlight and shadow areas. In shadows, just blend in a layer of Payne's Grey. Then layer thin colour of the petal on it keeping it smooth.Keep the brush strokes going in the directions that the lines of the petals flowing naturally. The areas which will be highlighted will have to be underpainted with Titanium White again.
  7. Repeat actions for additional flowers. For those who have overlap to another layer associated with flowers, make sure to dry the first layer before adding to this.
  8. Add leaves as well as stems. Using a green paint, add in lines associated with varying thickness with regard to stems. Use a broader brush for making the leaves.
  9. Complete the painting. Let it dry. Apply varnish onto the painting and finish off the piece of art.

How to avoid bubbles


Bubble, Bubble its a Trouble...

Acrylic has a tendency to cause bubbling in paint layers, unless you take care to avoid them. Here are some tips to keep your paint layer bubble free.

  1. Always pour liquid from one container to another very slowly and carefully from a low angle to keep the fluid from coming out too fast and bubbling.
  2. Mix and stir solutions the day before so the solutions has time to rest and the bubbles can pop.
  3. Always use a soft bristled brush. This is usually the main culprit for the cause. Yes, I mean the brush should be very soft.
  4. Spray applying varnish will eliminate bubbles altogether.

Tuesday, July 17, 2012

Is Water Using With Acrylic - Good or Bad?


There seems to be a myth that you are not supposed to use water with acrylic, and there's another one that you should always use water. This issue with water was something that really complicated me when I first started using acrylic paints. Let me clear this up.

Basically water is not a bad thing to add to acrylic. However, there are some basic issues that when understood will help you decide when to use it and when not to use it.

First let's look at what makes paint. Generally all paint is made of 2 basic components: pigment (for colour) and binder (to make the pigment usable as a paint). So there's pigment and binder, then there's the solvent. each medium has a solvent that will break it down. For acrylic the solvent is water. The water quickly evaporates and only the dry medium and pigment are left behind.

Acrylic without water will produce a paint film layer that looks juicy, glossy and substantial when applied over any surface. You can add up to 20% water to acrylic paint, and it will still have that juicy, glossy paint film, it will just get a bit thinner. And when you add 50% or 80% water to acrylic paint it is called as overdiluted. It looks totally different when it is overdiluted. It will give a watercolour effect.

So here are some key ideas:

  1. Use acrylic without any water at all for a rich, juicy, glossy , plastic, high coverage layer.
  2. Use up to 20% water to acrylic to get slightly loosen paint.
  3. Adding up to 30% water will give the paint a more matte (flat) appearance and lighten the intensity of the colours.
  4. Add 80% water to 20% paint to get an overdiluted wash to get a specific effect (a kind of watercolour effect).
  5. Having a little spray bottle of water handy allows you to add a mist of water as you paint to prevent the acrylic medium from drying before you are ready.Acrylic paint dries very fast, and once happens, remember, it is permanent. Asprayer can keep the paint liquid a bit longer. Do not use the water all over your palette to slow the drying or you won't be able to control how much water is going into your paint.

Of course, you can use no water at all.

This will give you the brightest colour, fastest drying time, and easiest use. Even the brush wetting can be skipped entirely, as long as you rinse the brushes with water once done (remember, it dries fast).

Again, the most important thing to remember is determining how much water you want in your paint depending on the type of effect you are looking for.

Wednesday, July 11, 2012

How to Prime a Canvas for Acrylic or Oils


Priming a canvas for acrylic or oil painting is not difficult, and it's not even necessary if you are using  pre-primed store-bought canvases.

But if you have made your own stretcher bars or even just stretched un-primed cotton canvases over store-bought stretcher bars then it's very important to use Gesso to cover the surface of your canvas before you start with your paint.

When you have stretched your canvas, the next step is to prime it so you can paint on it. With a ready-made gesso suitable for both acrylic and oil painting, this is easy.

Priming a canvasWhat you need: 

  1. Acrylic Gesso (found at any art supply store) 
  2. Wide Brush or a regular house painting brush
  3. some water
  4. a bowl and spoon
  5. your raw canvas


Here's how:

  1. Make sure you buy a gesso that's suitable for both acrylic and oil painting. This dries very fast and is painted directly on to the stretched canvas.
  2. Shake the container very well before using. Do not skip this step!
  3. Decide whether you are going to apply one or a few coats of gesso. One coat gives a rougher finish. If you are applying only one coat, use the gesso as it comes out of the bottle.
  4. If you are going to apply several coats, dilute the gesso with some water. Add Water Liquid Gesso
  5. Using an old, wide brush, apply the gesso directly to the stretched canvas in even strokes. Work from the top to the bottom of the canvas, in parallel strokes from one edge to the other. Prime Canvas Find Drips
  6. When you're done, wash your brush out immediately with soap and water. Once gesso has dried on a brush, it won't come out.
Tips: 
  1. A cheap decorating brush works well, but wash it several times before you use it as the hairs tend to fall out. If you want the brush to be thinner, cut off some of the hairs with a pair of scissors.
  2. Instead of diluting the gesso, you can sand down the canvas between coats if you want a smoother finish.
  3. Gesso thinned with water only, rather than gloss medium and water, tends to crack.
  4. Gesso can also be used to prime hardboard.

Tuesday, July 10, 2012

Primer or Gesso


Gesso is a generic term used for the initial coat applied onto a surface before you paint on it. Gesso is an initial coat applied on the surface on which you are painting, whether it's canvas, wood or even paper. The purpose of gesso is to protect the surface from the paint, some of which contain components that could damage it, provides the surface for the paint to stick to, and affects the absorbency of the surface.Gesso dries to a matt, rough surface that provides adhesion for the paint. To get a smoother finish, you can sand it.

Most ready-made canvases are primed with an acrylic gesso, and are suitable for both oils and acrylics.The packaging on the canvas will tell you what type of primer was used.

If you are unsure whether a canvas is primed or not, compare the front and the back. Sometimes the color will make it immediately evident, otherwise look at whether the grain of the fabric has been filled in or not. If in doubt, give it another coat.


Acrylic Paint Brushes


As I have said in other article, there are 8 main types of artist paint brushes that are used with acrylics. Each one is specially intended for different uses. However, this is only a guide. You use them whichever way you like whilst you get a bit of experience with them. It's what makes you feel comfortable that's best for you and your painting...

So now let's find out what each brush is meant for!


Round Paint Brush

round or pointed tip
good for: sketching, outlining, detailed work, controlled washes, filling in small areas. creates thin to thick lines- thin at the tip, becoming wider the more its pressed down.. used with thinned paint rather than thick paint.
Pointed Round Paint Brush


narrower than the round paintbrush. has sharply pointed tip.
good for: fine details and lines. delicate areas, spotting and retouching.


Flat Paint Brush


square end, with medium to long hairs.
good for: bold strokes, washes, filling wide spaces, impasto. can use edge for     fine lines, straight edges and stripes. long haired flat brushes are ideal for varnishing. 


Bright Paint Brush
Filbert Paint Brush


flat with edges curved inward at tip, with shortish hairs.
good for: short controlled strokes. thick, heavy color. better for working up close               rather than holding the brush at a distance from the canvas.


flat and oval-shaped end with medium to long hairs.
good for: blending, soft rounded edges like flower petals. this brush is sort of a    
combination of the rounds(because they can be used for detail) and flats(because they can cover more space than round).


Angular Flat (Shader) Paint Brush


flat with angled hairs at end.
good for: curved strokes and filling corners. can reach small areas with tip. also can be used to cover lots of space, similar to flat brushes.


Fan Paint Brush


flat, spread hairs.
good for: natural hairs are good for smoothing, blending and feathering. synthetic hairs are better for textural effects, clouds, and leaves on trees. for acrylic use strong and sturdy one, otherwise the hairs will clump when paint is added.


Detail Round Paint Brush


rounds, hairs shorten in length. shorter handle.
good for: details and short strokes. holds more color than you think!



How To Choose Acrylic Paint Brushes


The type of brush you use plays a critical part in how your painting turns up. It is important to choose quality brushes to insure that your painting will come out the way you would like it to turn up. The paintbrush will be your magic wand for weaving colors across the canvas. 

Paintbrushes for acrylics come in many different shapes and sizes. The shapes and sizes of the brushes you choose to work with will depend mainly on how large you want to work, and how detailed you want to get. Take a look:


Choose Different Acrylic Brushes For Different Painting Purposes

                                               Different Kinds of Acrylic Paint Brushes

Acrylic brush shapes include rounds, pointed rounds, long flat, short flat, bright, filbert, angular flat, fan brush, and a rigger or detail round. Rounds are used for detailed works. Long flats are used when applying layers. It is great at painting straight edges. Short flat or bright brushes are good for straight lines but they require shorter strokes than long flat brushes. The filbert brush allows you to paint tapered strokes and soft edges. The fan brush is great when painting skies or leaves of a tree. Lastly, the rigger is used for painting very fine lines and detailed works. I can give a detailed description and uses of the acrylic paintbrushes in my coming posts. 


What acrylic colors should I get to start with?


There are many brands and types to choose from, so how do you know which ones to get? Well, it all depends on what level you are starting at and where you are coming from. For example, if you are an experienced oil painter but have decided to use acrylics because of their quick drying time, you will probably need a high quality, professional-grade paint. On the other hand, if you are new to painting, you don't need that level of quality as you are just learning the medium. The best paints for a student painter would be some good quality, student-grade paint.

To get started, you don’t need to buy a lot of colors. I would recommend that you have these 10 basic colors to start out with: 

  1. Titanium White
  2. Cadmium Yellow Medium Hue
  3. Cadmium Orange
  4. Cadmium Red Medium
  5. Alizarin Crimson
  6. Phthalo Green
  7. Phthalo Blue
  8. Dioxazine Purple
  9. Burnt Sienna
  10. Ivory Black    
With a little practice you can mix any color you need starting from these basic 10 colors. All you need is to mix white and black which you have, and there you got grey!! Who needs to buy grey paint?

If you need to mix a specific color, always try to make it using the paints that you have on hand. If you try and the resulting colors aren't up to snuff, then go out and buy the color that closely matches what you need. This tactic will save you money in the long run. 

Sunday, July 8, 2012

Acrylic Painting Supplies


Gathering the right acrylic painting art supplies is the first step in learning how to paint with acrylics. In this page, I would like to provide a list of essential acrylic art supplies you'll need to get started painting with acrylics.

If you are a total beginner who is just getting started with acrylics, be sure to look through the list of artist supplies for acrylic painting that are listed below.

The 3 most important artist supplies you will need are acrylic paint, paint brushes and a painting surface such as canvas or wood panels.

Essential acrylic painting supplies:

  • acrylic paint
  • paint brushes
  • painting surface- canvas, wood, cardboard etc.
  • artist palette
  • rag/paper towels
  • cup or jar of water
  • soap for clean- up
  • varnish

Tough, Versatile Acrylics


Acrylic paints are very tough, even tougher than oils. Once dry, acrylics are permanent, flexible and water insoluble. If you wish, you can gently wash the surface of a dry acrylic painting with soap and water. Acrylics will not yellow with age, either.

Another great quality of acrylics is that they can be used for a variety of projects where durability and flexibility are needed. You can apply these paints straight from the tub or jar, or thin them with water for watercolor or airbrush. They are also excellent for decorative painting around the house, collage, airbrush, murals, silk screening, paper-mache, brush and pallet knife, fabric painting, silk screening, photo retouching and more. Acrylics are usually less expensive than oils, too.

Since acrylics are waterproof when dry, they are excellent for outdoor works. However, dried acrylic paints are microscopically porous, so it's a good idea to use a varnish, especially if the painting will be exposed to the weather.

Cleanup is easy with acrylics. As long as your brushes are kept wet, you can wash them with soap and warm water. Instead of using a wood palette, one made of Plexiglas or glass allows you to easily peel off any excess paint that dries on the palette. You can also use a disposable paper palette for easy cleanup.

What is Acrylic Paint?


Acrylic paint is made up of pigment, suspended in an acrylic polymer emulsion. In other words, the colour is hanging in a  mixture of multiple chemicals that create a thick paste.  Acrylic paint is fast drying, making it great for the artists that like to paint quickly. Acrylic paint is thicker than any other paints.


Acrylic paint is available in tubes and in small plastic pots. If you need to buy a lot of paint, they it is available in plastic jugs. This paint is ideal for students to use because it does not require any strong smelling chemicals.

Acrylic paint can be made thick, allowing the artist to get oil- painting like effects. Using different additives, it can be made thinner allowing the artist to get an appearance of watercolour effects. Several  additives are available to change the properties of acrylic. These additives have the ability to make the acrylic paint thicker, thinner, or slower drying.  Water can also be added to make the paint softer. But adding too much of water is not a good idea. This can make the paint unusable. There are also many additives to give you many different effects, including: a matte finish, a glossy finish, a pearl finish, glitter, and an additive that will make the paint almost as thick as clay.

Other than canvas painting, acrylic paint can also be used in pottery and glass. Speciality acrylic are also available for fabric, to decorate clothes. Acrylic can be painted on virtually anything. You can use paper, canvas, cardboard, and just about anything else that comes to minds. As an artist you should embrace your creativity and explore the seemingly limitless options that acrylic paints provide to you.


There is a dark side to acrylics. If acrylics dry on a brush, you will probably need to replace the brush, as it will be almost impossible to remove the dried paint. It's best to use synthetic brushes with acrylics. Acrylics will adhere more strongly to natural fibers, making natural fiber brushes harder to clean.

So give acrylics a try. I'm sure you'll love their ease of use, versatility and broad palette of colors.

Saturday, July 7, 2012

Acrylic Paint- Tips for Beginners


Acrylic paint, when compared with other mediums like oil paint, is a fairly new addition to the world of painting. Acrylic paint is fast drying paint containing pigment suspension in acrylic polymer emulsion. Acrylic paints are an extremely versatile paint medium. Acrylics paints can be thinned with water, or can be used straight from the tubes like oil paints. Acrylic paint does not yellow or harden with age like oils. Some other benefits of acrylic paints are their permanence and ease of use.

Since acrylic paint dries so quickly, colors can be applied and layered quicker than oil paints. But with this fast drying time comes a few disadvantages:
1) The paint will not remain workable for very long, so you have to work fast.
2) Brushes can be ruined if you do not clean them right away.
3) If you plan to paint outdoors, then acrylic paint is probably not the best medium to use, especially on a hot sunny day. When you lay out your colors on a palette or other surface, they will begin to dry quickly forming skins on the surface, making them quite difficult to work with. In this case you should work with acrylic slow drying medium.
4)Acrylic paints can be diluted with water, but become water resistant when dry.

Depending on how much the paint is diluted (with water) or modified with acrylic gels, media, or pastes, the finished acrylic painting can resemble a watercolour or an oil painting, or have its own unique characteristics not attainable with other media.

Welcome Friends!!!


Hi all!

My name is Sobiya Sudeep. I have been reading so many blogs lately and have become inspired to start my own other than using my FB page. So, I'm thrilled to begin this new blog "Painting Illusion" to share my thoughts and paintings to you.

So, welcome to my world!!! Please leave comments, they are valuable and inspire me in many ways.